How to e-Sign Your Disclosures with PowerTPO
If your lender is PowerTPO, you’ll receive your loan disclosures through their secure online signing system. This lets you review, sign, and return important loan documents quickly — no printing, scanning, or mailing needed.
By signing electronically, you:
- Keep your loan process moving faster
- Review documents from any device, anytime
- Use secure identity verification for added protection
Here’s everything you need to know to create your account, log in, and complete your disclosure tasks.
Step-by-Step: How to e-Sign Disclosures with PowerTPO
1. Create Your Account
- Look for an email from noreply-mortgagetech@ice.com.
- Scroll down and click the link to get started.
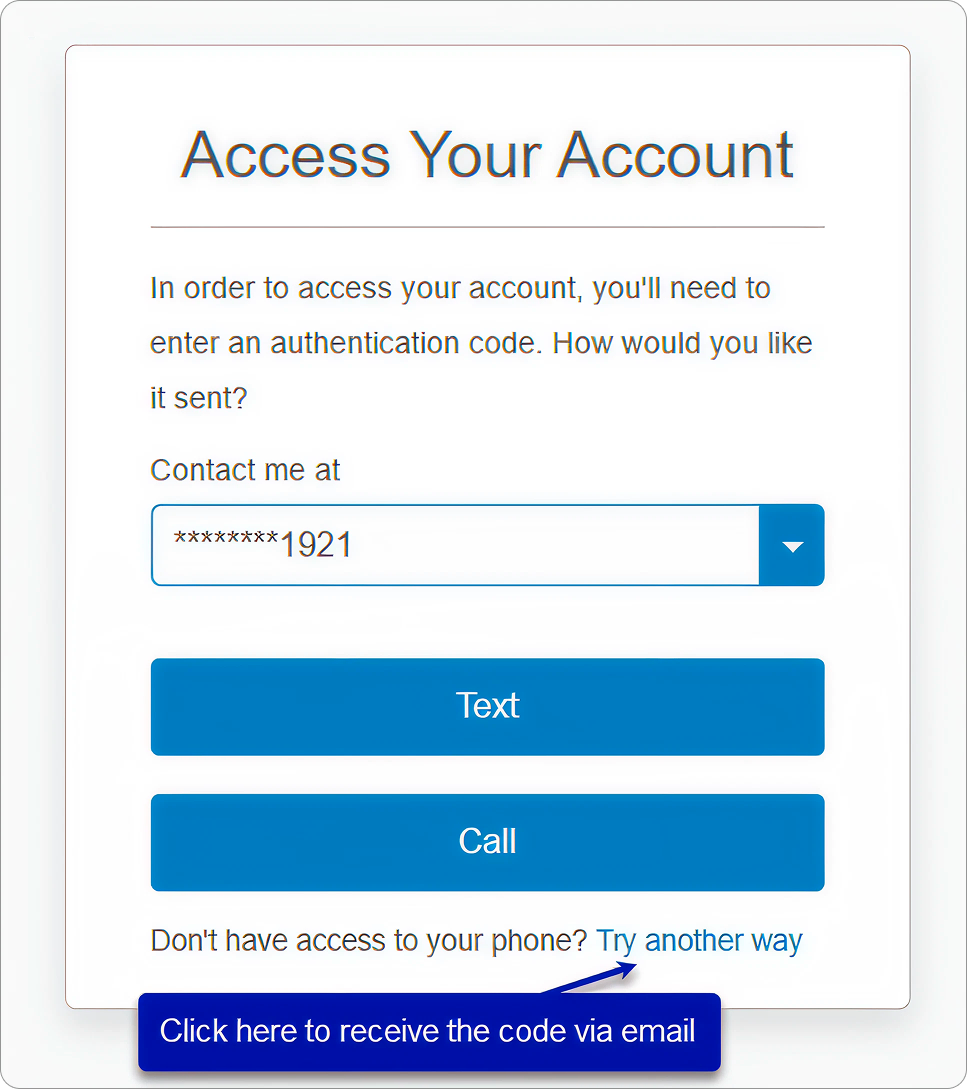
- Choose how you’d like to get your one-time passcode: Text, Call, or Email (click Try another way for email).
- Enter the passcode you receive and click Submit.
- Create a password (your username will already be filled in) and click Continue.
2. Log In
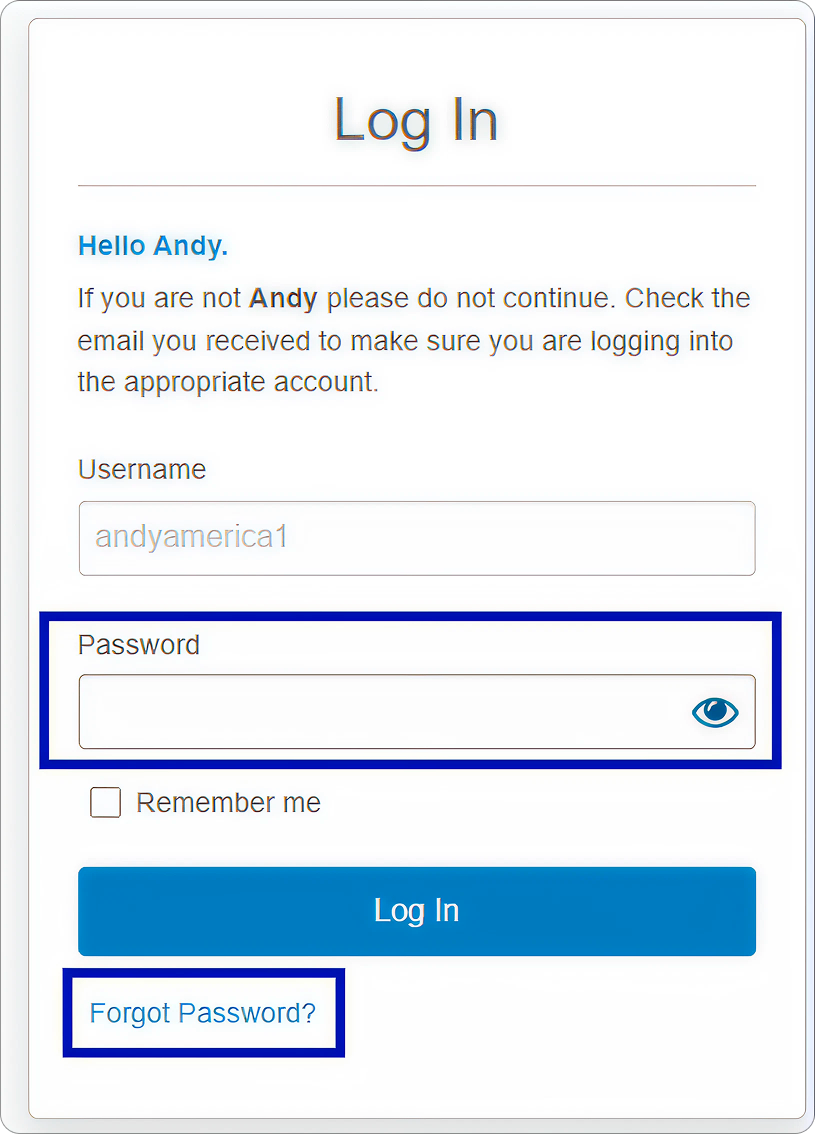
- Use the link in the email to access your account.
- Enter your pre-filled username and the password you created.
- Forgot your password? Click Forgot Password? to reset it.
- If you’re on a new device, you may be asked for another one-time passcode.
3. Provide Electronic Consent
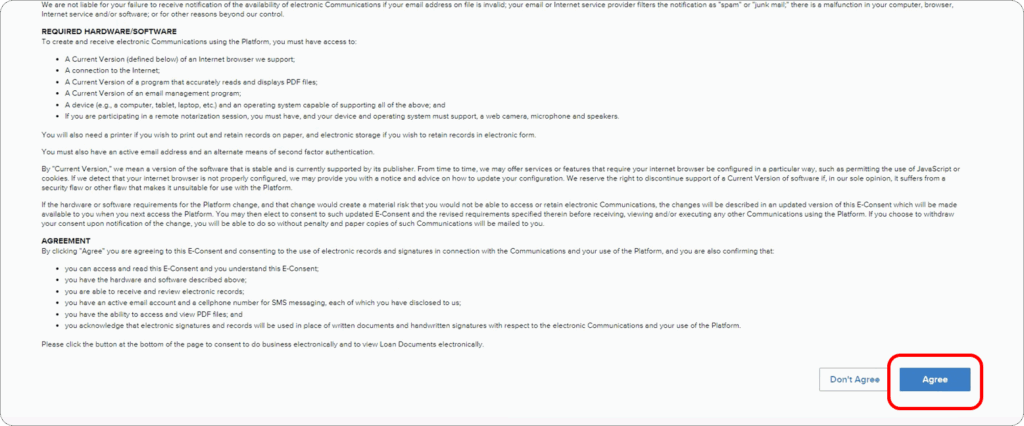
- The first time you log in, you’ll see the Electronic Consent Agreement.
- Read it and click Agree to continue.
- If you click Don’t Agree, your disclosures will be mailed instead — which can slow down your loan timeline.
4. View Your Disclosure Tasks
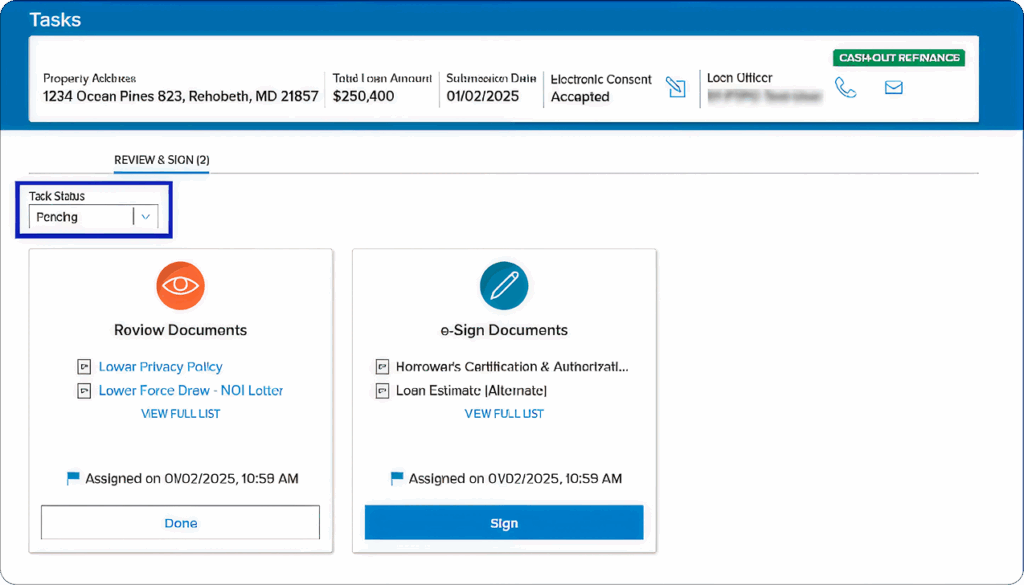
- After giving consent, you’ll see a task list.
- Pending tasks will be clearly marked so you know what’s next.
- Completed tasks can always be viewed, saved, or printed later.
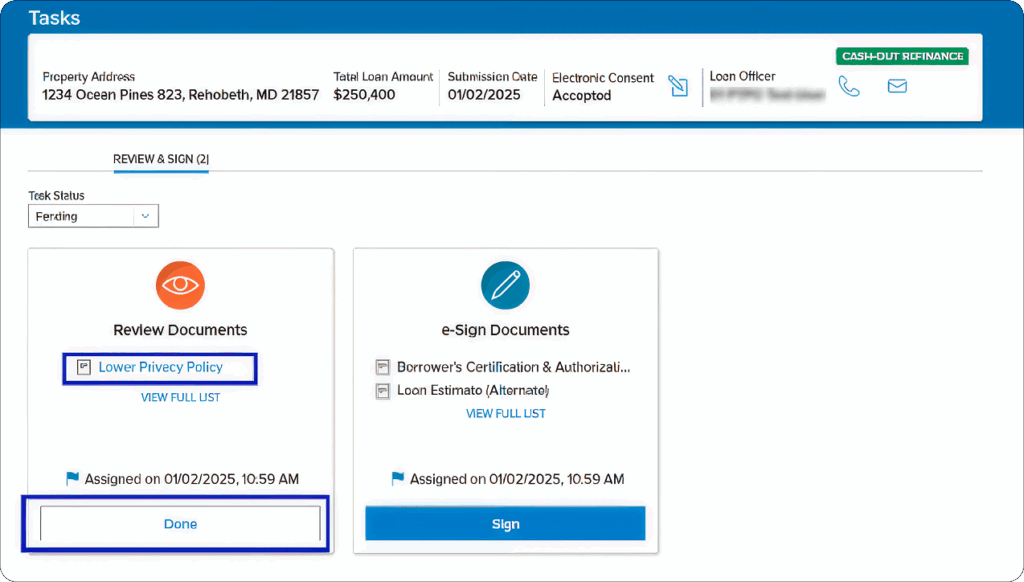
5. Review Documents
- Some documents only need to be reviewed — no signature required.
- Click the document link under the Review Documents task.
- Once you’re done reviewing, mark the task as Done.
6. e-Sign Documents
For documents that need your signature:
- Click Sign under the eSign Documents task.
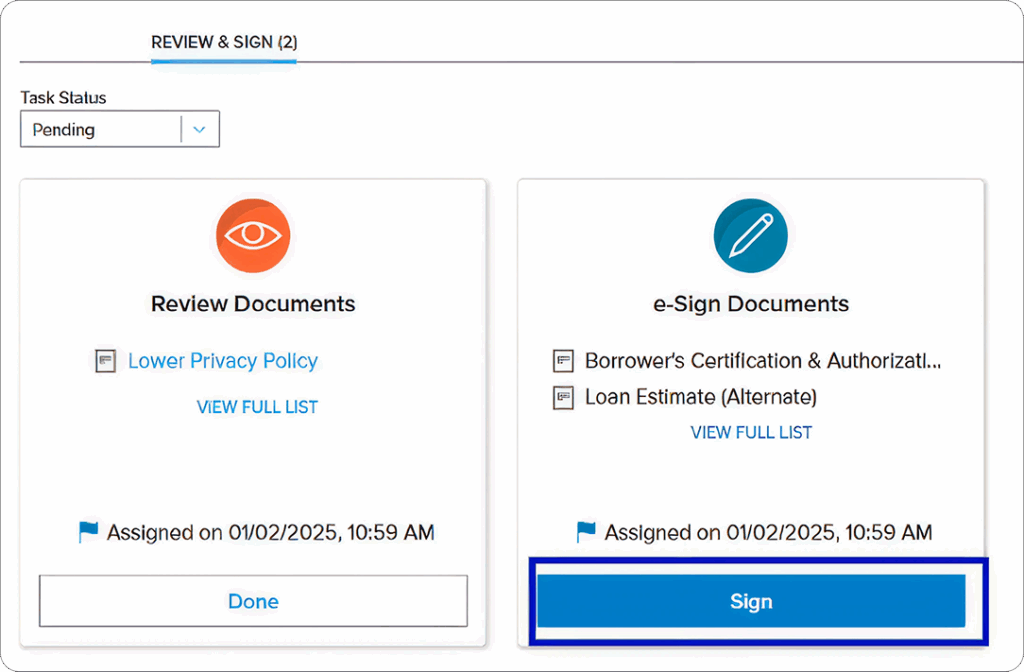
- Click Next to move into the signing process.
- Read through your disclosures carefully.
- When you see a yellow Sign tab, click to place your signature.

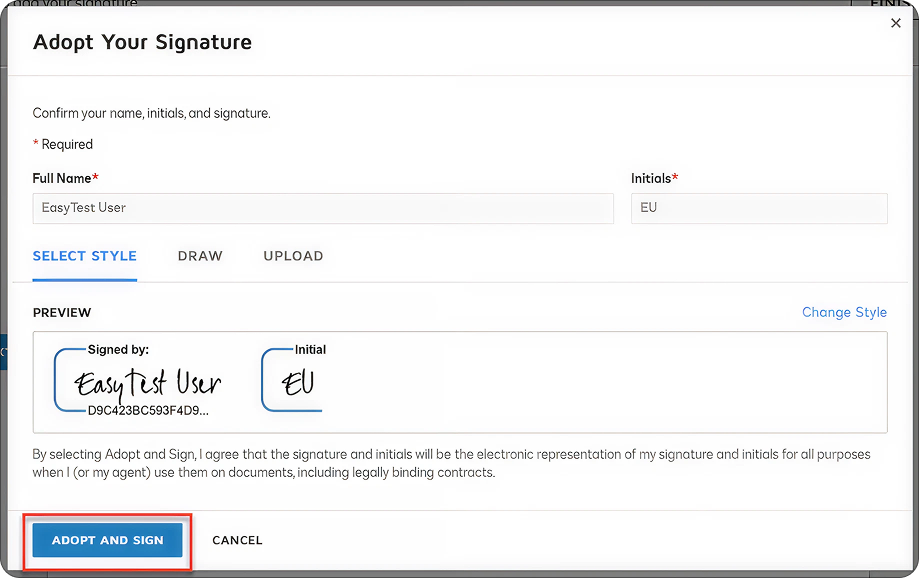
- Click Adopt and Sign — you can choose a style, draw, or upload your own.
- Click any yellow Initial tabs to add your initials.
- If you see a Fill In tab, type in the information requested.
- If you see a Choose tab, select the option(s) that apply.
- Once everything is complete, click Finish at the top of the screen.

7. Save Your Signed Documents
Completed disclosures can be found under Completed Tasks.
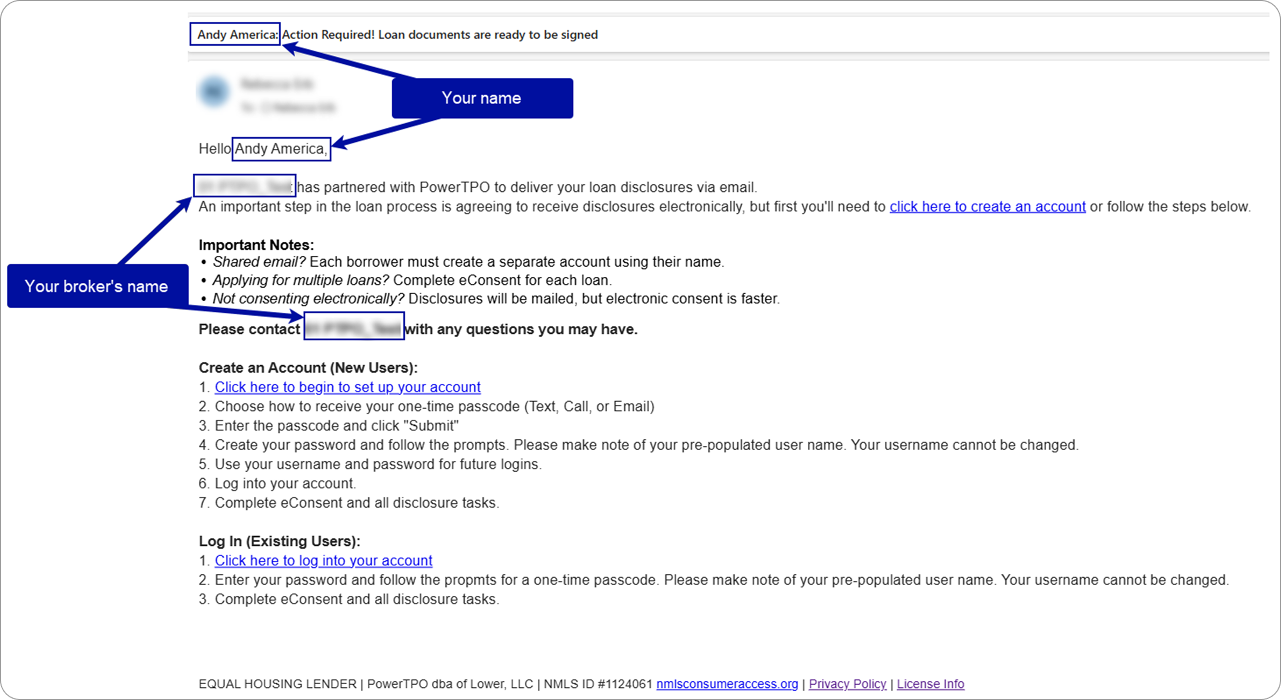
Email Examples
- Action Required! Loan Documents Ready to be Signed
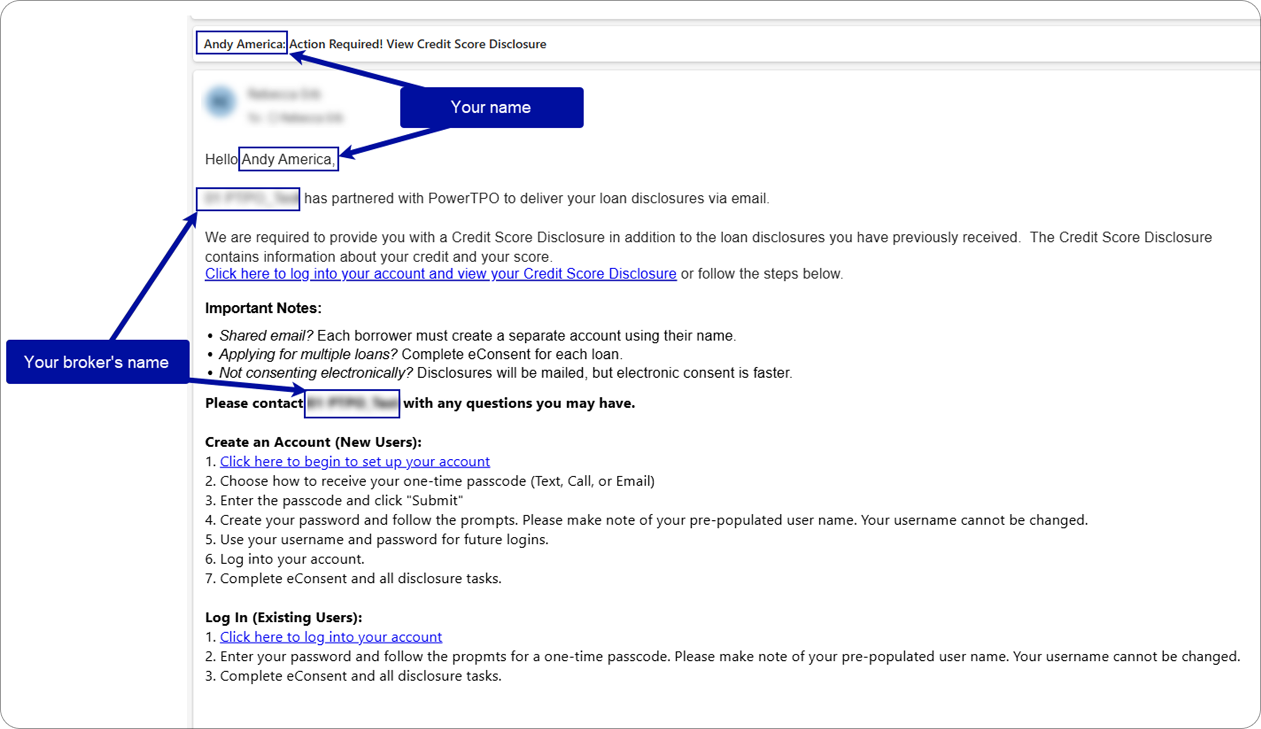
- Action Required! View Credit Score Disclosure
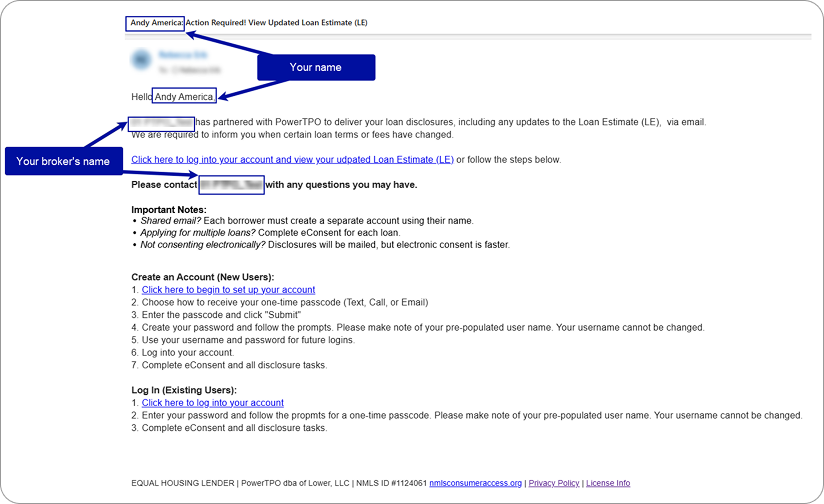
- Action Required! View Updated Loan Estimate (LE)
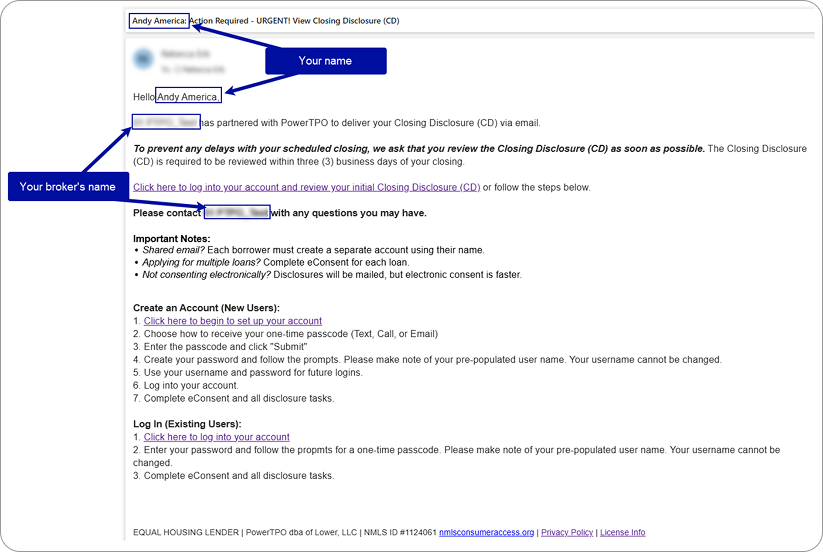
- Action Required – URGENT! View Closing Disclosure (CD)
Tips for a Smooth Signing
- Emails always come from: noreply-mortgagetech@ice.com — check spam or promotions if you don’t see them.
- Keep your phone close by — you’ll need it to receive the one-time passcode.
- Act quickly on codes — text codes expire after 15 minutes.
- Don’t delay signing — unsigned disclosures can slow down your loan progress.
Final Thoughts
Signing your disclosures with PowerTPO online is quick, safe, and stress-free. You’ll avoid paperwork headaches, keep your loan moving, and have all your signed documents stored digitally for easy access.
If you ever have trouble — whether it’s with your code, password, or opening a document — your UnrealFi loan advisor is just a call or email away. They’ll help you resolve the issue so you can stay on track.
Once your disclosures are signed, you’re officially one big step closer to closing on your home.


