How to e-Sign Disclosure with FCM TPM
Borrowers working with FCM TPO can securely review and electronically sign their disclosures through the ICE platform. This convenient process eliminates the need to print, scan, or mail documents, and can be completed from your computer, tablet, or smartphone.
By signing electronically, you can:
- Keep your loan process moving quickly
- Review documents from anywhere
- Sign securely with built-in identity verification
The whole process usually takes little time — and you can complete it on your phone, tablet, or computer.
Here’s exactly how to complete the process from start to finish.
Step-by-Step: How to e-Sign Disclosures with FCM TPO
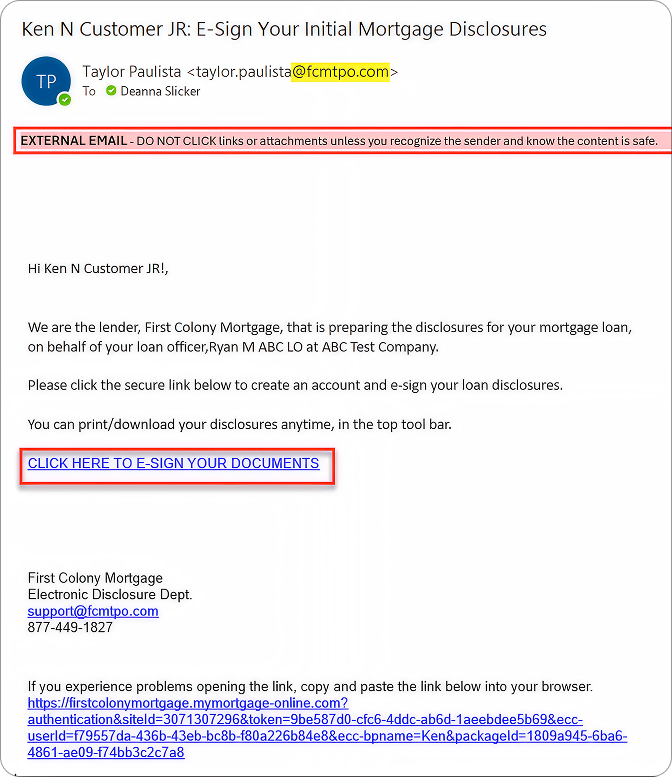
1. Check your email
You will receive an email from an @fcmtpo.com email address based on the information provided on your loan application. This email may go to your spam or junk folder, so check there if you don’t see it.
Open the email and click CLICK HERE TO E-SIGN YOUR DOCUMENTS.
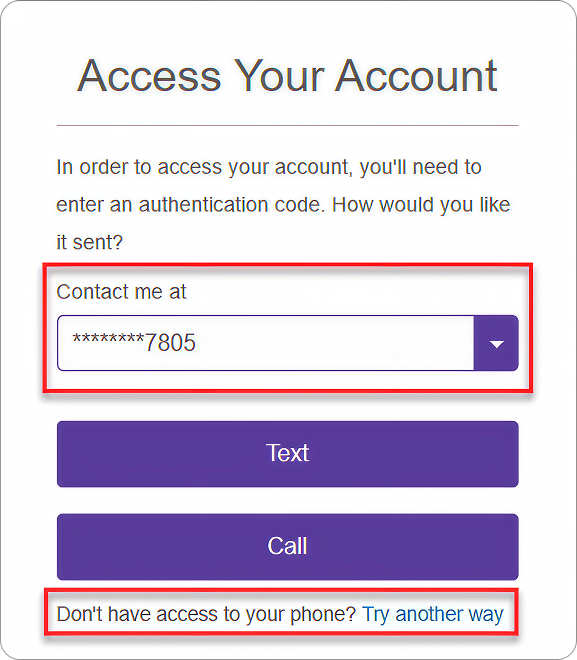
2. Access Your Account
Choose how you’d like to receive your one-time passcode:
- Text message: Confirm the last four digits of your phone number in the “Contact Me” box and click Text.
- Email: If you don’t have access to your phone, click Try another way and select email delivery.
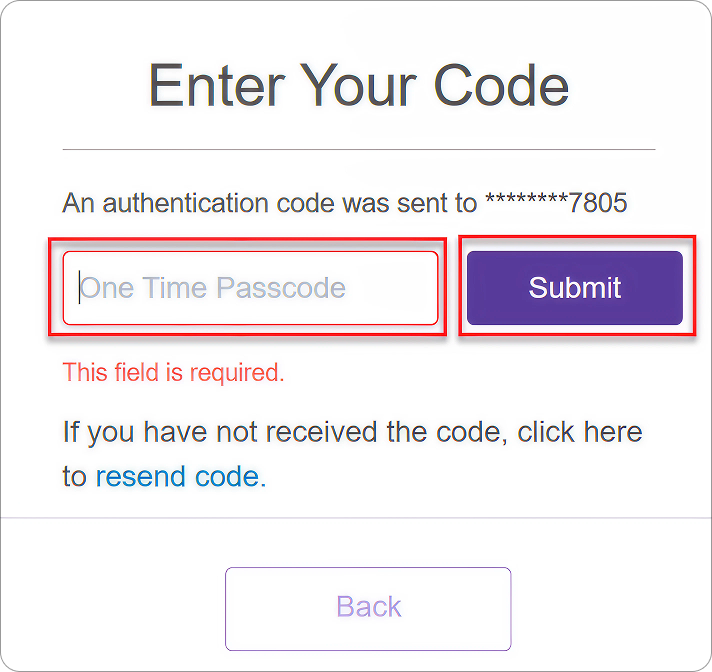
3. Enter Your Code
Enter the passcode sent to you via text or email in the One Time Passcode box and then click Submit.
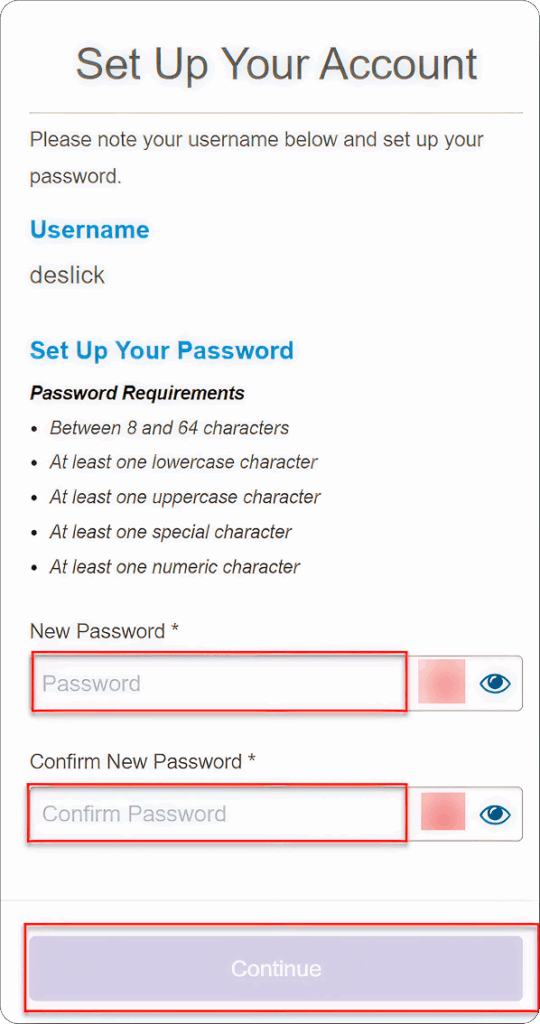
4. Set Up Your Account
Create a password that meets requirements. Type your new password in both fields, then click Continue.
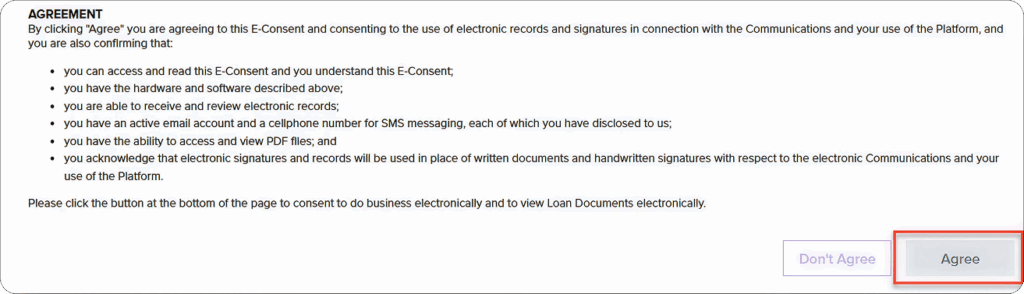
5. Accept the Electronic Consent Agreemen
Read through the agreement, then scroll to the bottom of the page and click Submit to move on.
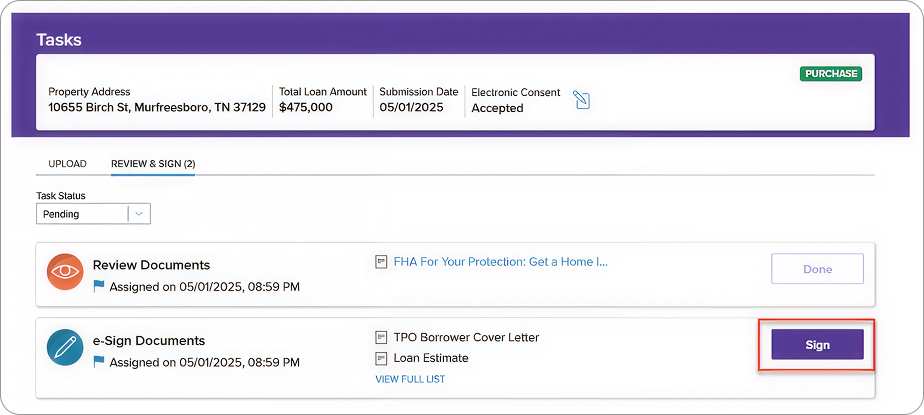
6. Begin Your Tasks
On the Tasks page, click Sign.
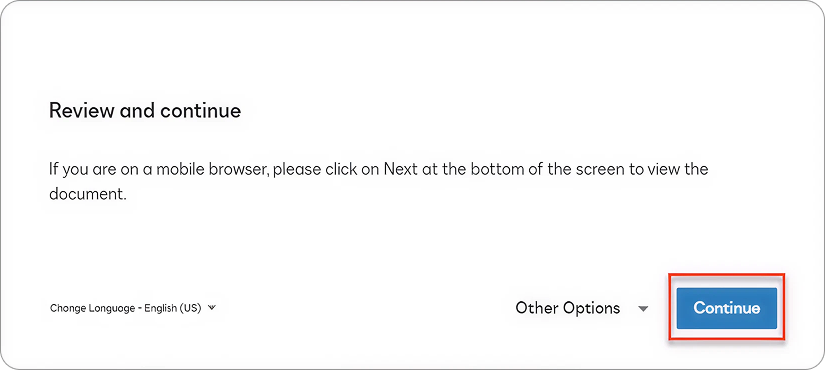
7. Review and Continue
Click Continue to move forward.
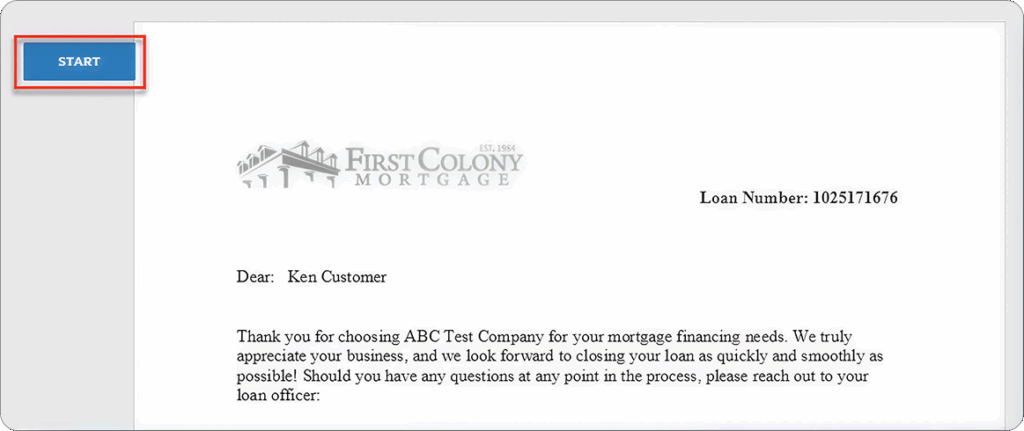
8. Start the Signing Process
Click Start on the left side of the document.
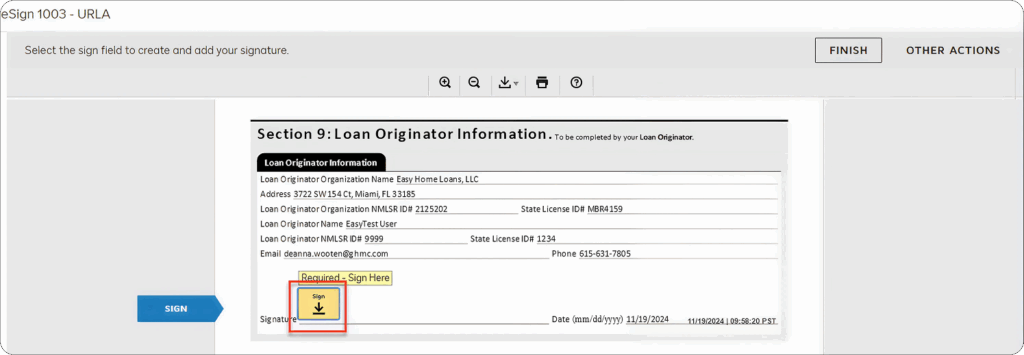
9. Sign the First Field
The system will guide you to the first signature line. Click the Sign icon.

10. Adopt Your Signature
Click the yellow Sign box to place your electronic signature.
If this is your first time using DocuSign, see our guide: How to Sign Documents with DocuSign.

11. Complete All Signature Fields
Continue clicking the Sign icon for each required signature until all are complete.
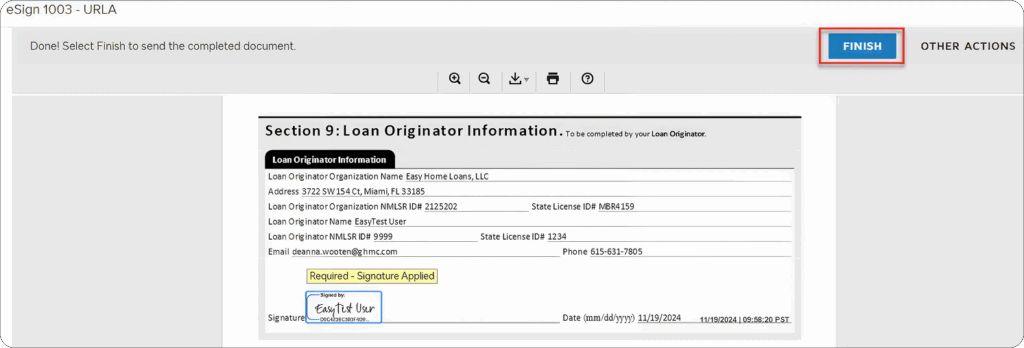
12. Finish the Signing Process
Once all the fields are signed – click Finish in the top right corner.
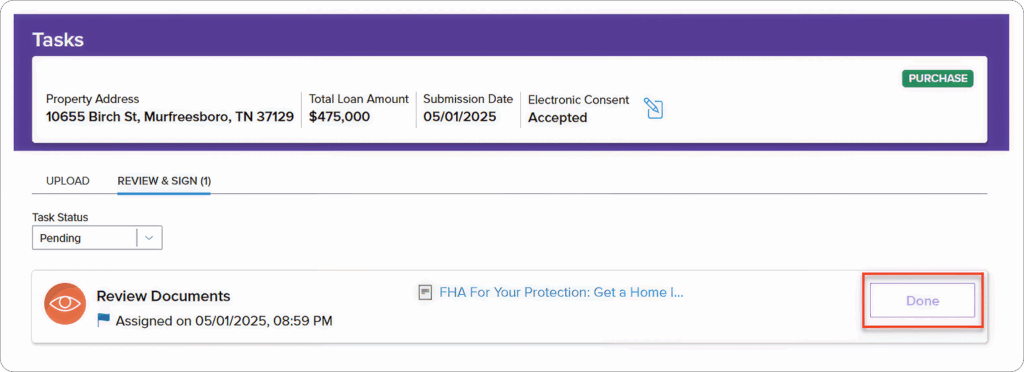
13. Finish Tasks
Once all fields are signed, you’ll be redirected back to the Tasks page. Then, click Done.
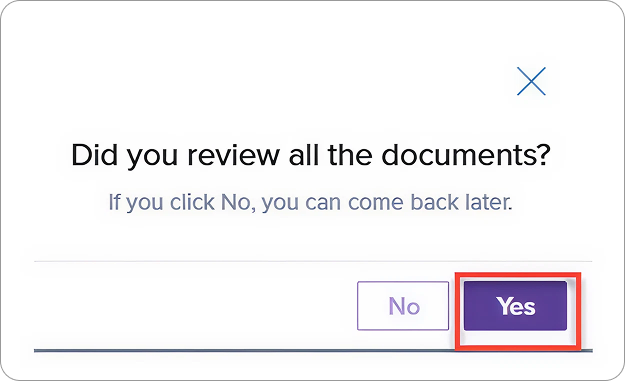
14. Confirm Review
A pop-up will appear asking if you reviewed all documents – Click Yes, if you did.
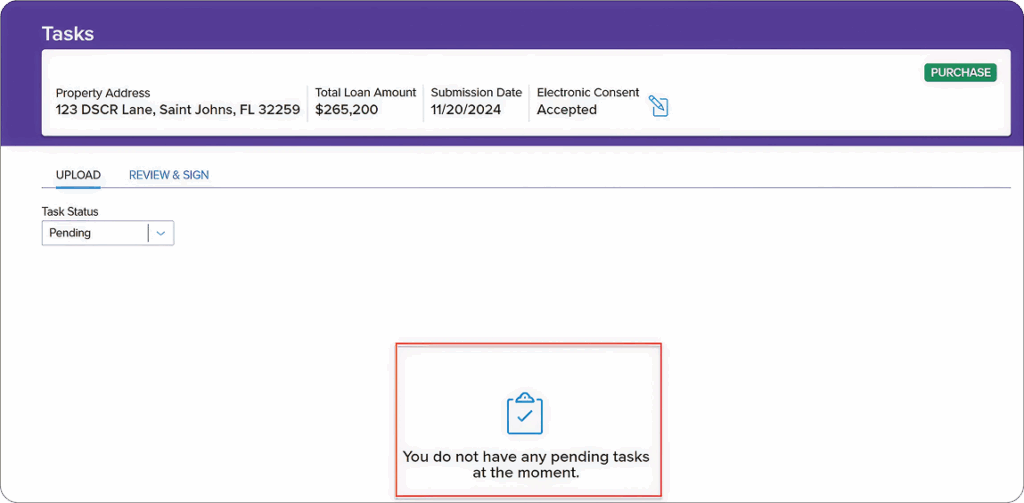
15. Completion Message
You will see: “You do not have any pending tasks at the moment.” Your e-sign process is now complete.
Tips for a Smooth Signing
- Have your phone nearby — you’ll need it to receive your verification code.
- Check your spam or promotions folder if you don’t see the ResiCentral email in your inbox.
- Be mindful of code attempts — after 5 failed code entries, your account will lock and must be reset by ICE Mortgage Technology (your loan advisor can help).
- Password help is available — if you forget it, click Forgot Password or ask your UnrealFi loan advisor to reset it for you.
- New to DocuSign? Reviewing the How to Sign Documents with DocuSign guide first will make the process even faster.
Final Thoughts
E-signing disclosures with FCM TPO through ICE is a quick, secure, and convenient way to complete your loan paperwork. Once done, your documents are automatically sent to your loan officer for processing.
If you run into any issues during the process, your UnrealFi loan advisor is ready to help.